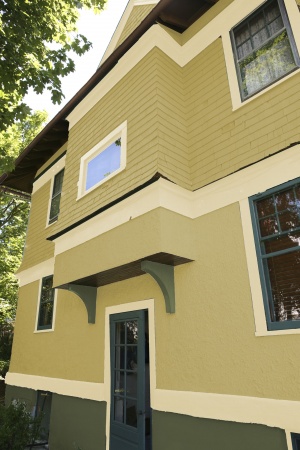
Testing paint colors on a photograph
From ShawnReevesWiki
Jump to navigationJump to search
Using Adobe Photoshop to try different color schemes on a house

Using Adjustment Layers
I have used Photoshop to try many different colors on the same photo of our house. Below are the steps to providing a template for a palette of any number of tints that you can change quickly. This method preserves details in shading, such as the texture of stucco or clapboard or shingles, but discards any color casts such as a green tint cast from a tree onto a white wall.
Selecting sections to color
- Take a digital photo of the house, well-lit. Do it on a bright, overcast day to minimize shadows, and take a exposure where none of the house is washed out in sunlight and no color is obscured by shadows.
- Open the photo in Photoshop.
- Select a section you will paint a single color, such as window-trim.
- Use Quick Selection Tool for large areas with distinct edges with complex shapes. The QST adds to any selection by default. To remove sections, press option.
- Use polygon lasso for simpler straight-edged shapes. To add to an existing selection, press the shift-key when you start a new polygon. To subtract a polygon, press the option-key when you start a new polygon.
- You will have to practice selecting around trees and bushes and other obstructions. It is usually better to paint over a tree than missing siding/trim to avoid the tree.
- When you've selected all the areas of a single color, save the selection, using the menu item "Select>Save Selection..." with the parameters "Document:{the name of the current doc}; Channel:New; Name:name of this section of the house." This allows you to call up the selection and edit it if you need to improve it.
- With the selection still showing, and the layer of the whole house selected in the Layers palette (this is important for the second and subsequent iterations when you'll have many layers), create a new Adjustment Layer using the menu "Layer>New Adjustment Layer>Hue/Saturation" with the parameters "Use Previous Layer to Create Clipping Mask:checked; Color:{not important, but useful to keep layers distinguishable}; Mode Normal." Name the Adjustment Layer after the section selected.
- Repeat for all sections.
Colorizing individual sections
- In the Layers palette, click on the palette icon for the Adjustment Layer named after the section you want to colorize.
- In the Properties palette, click "Colorize," then adjust the hue, saturation, and level to match the color you want to try. See #How to get HSV figures from RGB figures.
- Repeat for all sections.
- Save a version (I use "File>Save for Web") for each scheme you create.
Advanced skills
- If you'd like to combine two or more selections, for example when you want to try the same paint color on trim and columns, you can load one selection then load the next using "Add to selection" in the Load Selection dialog. Similarly, you can subtract a saved selection from the current selection.
- Choose "Select>Inverse" to use the same edge for the opposite side, usually then subtracting other parts manually with a polygon lasso or by using the subtraction method above.
How to get HSV figures from RGB figures
Often the paint company will offer the relative values of red, green, and blue in a color. For example, see Sherwin William's details on their color "Stonebriar": http://www.sherwin-williams.com/homeowners/color/find-and-explore-colors/paint-colors-by-family/SW7693-stonebriar/
Use an online calculator to change that to hue, saturation, and value: